Categories


Imagine you’re building a new car. The frontend is like the body of the car—it's sleek, shiny, and everything that the driver and passengers see and interact with. It's the part you touch, feel, and experience every day. But, hidden beneath the beautiful exterior is the backend, like the engine and all the intricate mechanics that power the car. It’s the heart of the operation, keeping everything running smoothly behind the scenes.
Now, think about your website as this car. The frontend is what your visitors see—the design, the buttons, the forms, and the content that invites them to engage. The backend, however, is the engine—handling data storage, processing, and all the magic that makes the site function. Integrating the frontend with the backend is like connecting the body to the engine, ensuring that the whole system works in harmony. Without this connection, your website could look great, but it wouldn’t be functional.
In this guide, we’ll break down how to integrate your frontend and backend, step by step, in a way that’s easy to follow. You don’t need to be an expert to understand the process—we’ll keep it simple and human. So, let’s dive in and explore how you can build a website that works beautifully and efficiently!
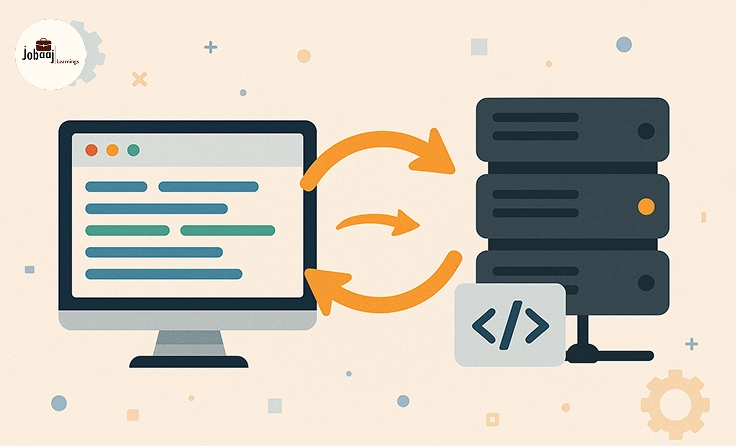
What is Frontend and Backend Integration?
At its core, frontend and backend integration is all about communication—ensuring that the visually stunning parts of your website (the frontend) are seamlessly connected to the engine behind the scenes (the backend). Let’s break this down further.
The frontend is everything your users see and interact with. It includes the layout, design, content, and interactive elements. Think of it as the window through which your visitors experience your site. You can use HTML, CSS, and JavaScript (or frameworks like React, Vue, or Angular) to build the frontend. It’s the “face” of your website, and it must be intuitive and user-friendly to keep visitors engaged.
On the other hand, the backend is the invisible machinery that processes, stores, and retrieves data. The backend is responsible for making sure that when a user interacts with the frontend, everything works as expected. It might handle things like user logins, form submissions, or data retrieval from a database. Without a solid backend, all the interactions on the frontend would be empty, like a car with no engine.
When we talk about integration, we’re referring to connecting these two parts so that they communicate seamlessly. When a user submits a form on the frontend, the data should be sent to the backend, processed, and then returned to the frontend for display. This interaction ensures that your website is not only visually appealing but also functional.
Step 1: Setting Up Your Backend
The first step in any integration process is setting up the backend. Without a solid backend foundation, your frontend will be nothing more than a static page. Let’s walk through the initial setup.
-
Choose Your Backend Framework: There are many backend frameworks available, depending on your programming language preference. If you’re familiar with JavaScript, Node.js with Express is a great option. For Python enthusiasts, Django or Flask might be ideal. For Ruby lovers, Ruby on Rails could be your choice. The goal is to select a framework that fits your needs and allows you to quickly set up routes, handle requests, and manage databases.
-
Database Setup: Your backend will need a database to store information. This could be user data, posts, or any other content that your site generates. You could use a relational database like MySQL or PostgreSQL, or a NoSQL database like MongoDB. Think of your database as the storage room of your website, keeping everything organized and accessible when needed.
-
Building APIs: The backend’s API (Application Programming Interface) is what allows your frontend to talk to the backend. When your frontend requests data (for example, user information), it will send an API call to the backend. The backend will then process this request, retrieve the necessary data, and send it back to the frontend.
At this stage, your backend should be able to handle requests, store data, and serve it to the frontend via APIs. You’ve now set the foundation for integrating the two parts of your website.
Step 2: Designing the Frontend
Now, with the backend in place, it’s time to work on the frontend—the part of your site users interact with. Your job here is to create an engaging, intuitive design that brings your site to life.
-
Design the User Interface: Start by sketching the layout of your site. What sections will you have? How will users navigate through the site? Whether it’s a landing page, blog, or e-commerce platform, the design should be visually appealing and easy to navigate.
-
Frontend Technologies: To bring your design to life, you’ll use HTML for the structure, CSS for styling, and JavaScript for interactivity. Frameworks like React, Angular, or Vue.js can help you build dynamic, interactive components that respond to user actions (like button clicks, form submissions, etc.).
-
User Experience (UX): The goal is to create a seamless experience for your users. This means ensuring that your site works well on mobile, has intuitive navigation, and responds quickly to user inputs. A fast and responsive frontend keeps users engaged and reduces bounce rates.
Once your frontend design is ready, it’s time to connect it to the backend. This is where API integration happens, allowing your frontend to request data from the backend and update the UI accordingly.
Step 3: Making the Connection—API Calls
This is the exciting part—where the frontend and backend come together. Now that your backend is set up and your frontend is designed, you need to make them communicate using API calls.
When users interact with the frontend (say, by filling out a form or clicking a button), the frontend needs to send a request to the backend. This is usually done via HTTP requests, which are sent to the backend APIs.
-
GET Request: If the frontend needs to retrieve data (like fetching a list of products), it sends a GET request to the backend.
-
POST Request: If a user submits a form (like a contact form or login credentials), the frontend sends a POST request to the backend to send the data for processing.
For example, using JavaScript’s fetch API:
fetch('https://yourbackendapi.com/products', { method: 'GET', headers: { 'Content-Type': 'application/json', }, }) .then(response => response.json()) .then(data => console.log(data)) .catch(error => console.error('Error:', error));
This simple API call fetches product data from the backend and displays it in the frontend. The backend responds with the data, and the frontend updates the UI to show the products to the user.
Step 4: Error Handling and Debugging
As with any development process, errors will occur—whether it's a broken API connection, data validation failure, or something unexpected happening on the server side. Proper error handling ensures that these problems don’t disrupt the user experience.
-
Frontend Error Handling: If an API request fails (say, if the backend is down or the request is invalid), display a user-friendly error message. This could be something simple like, “Oops, something went wrong. Please try again later.”
-
Backend Error Handling: On the backend, ensure that incoming data is validated before it’s processed. If invalid data is received, the backend should reject the request and send a clear error message back to the frontend.
Use debugging tools like console logs, Postman (for testing APIs), or browser developer tools to help identify and resolve issues quickly.
Step 5: Testing and Finalizing the Integration
Once your frontend and backend are connected, it's crucial to test everything. Testing ensures that your integration works as expected, and it helps catch any bugs before your website goes live.
-
Unit Testing: Start by testing individual functions or methods in both the frontend and backend.
-
Integration Testing: Make sure that the frontend and backend work together as expected. Test the data flow and ensure that the API calls return the correct data.
-
End-to-End Testing: Finally, test the entire user journey from start to finish. This will help you identify issues that could affect the overall user experience.
Once everything is working seamlessly, you’re ready to deploy your site!
Conclusion
Integrating the frontend and backend is a crucial step in building a fully functional website. By ensuring that these two components communicate effectively, you’ll create a dynamic, user-friendly experience that works seamlessly across all devices. From setting up the backend and designing the frontend to making API calls and handling errors, every step is essential for a successful integration. By following this guide, you now have the tools and knowledge to confidently integrate your frontend and backend, and build a website that is both beautiful and functional.