Categories


Life has a funny way of throwing unexpected challenges our way. Whether it’s a sudden medical emergency, an unexpected car repair, or losing your job, these situations can disrupt your financial stability. When they do, having an emergency fund can make all the difference. It’s like having a safety net that allows you to manage life's surprises without worrying about how you’ll pay the bills or cover immediate expenses.
Exploring a career in Investment Banking? Apply now!
But how do you build this safety net? Where do you even begin? If you’re new to saving or if it feels overwhelming to start, don’t worry—this guide is here to break it down for you. We'll walk you through the step-by-step process of building an emergency fund, how to stay motivated, and why having one is essential for your financial well-being.
By the end of this guide, you’ll have a clear plan to build your emergency fund and ensure that you’re financially prepared for life’s unpredictable moments.
Why is an Emergency Fund Important?
Before we dive into the “how,” let’s take a moment to understand why an emergency fund is so important. Imagine you’re hit with a big expense out of nowhere—a medical emergency, a car accident, or even an unexpected job loss. Without an emergency fund, you might need to rely on credit cards, loans, or even borrow money from friends or family. These options can lead to high interest rates, debt, and increased stress.
An emergency fund is your financial cushion. It gives you peace of mind, knowing that you don’t have to rely on external sources of help when something unexpected comes up. It also helps you avoid taking on hgh-interest debt, which can keep you trapped in financial instability for longer periods of time.
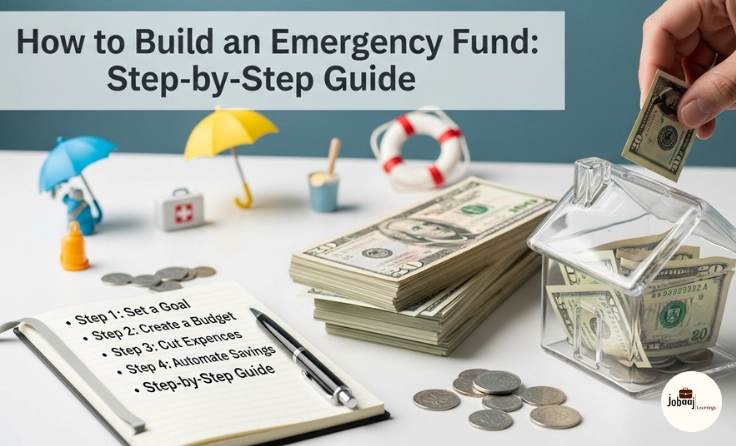
Step 1: Set a Clear Goal for Your Emergency Fund
The first step in building an emergency fund is setting a clear goal for how much money you need to save. Financial experts typically recommend having enough money to cover 3 to 6 months of living expenses. This is a good starting point, as it gives you a comfortable cushion to fall back on in case of an emergency.
But what if 3 to 6 months of expenses sounds like an impossible goal to reach? Don't worry! You can always break it down into smaller, more achievable goals. Start with saving just one month of expenses, and then gradually work your way up. Having a clear target helps keep you motivated and gives you something tangible to work toward.
Step 2: Review Your Monthly Expenses
The next step is to figure out how much money you need to set aside. This is where you’ll need to take a look at your monthly expenses. What are the essentials you need to live comfortably? Think about:
-
Rent or mortgage payments
-
Utilities (electricity, water, internet)
-
Groceries and food
-
Health insurance
-
Transportation (car payments, gas, insurance)
-
Loan payments (student loans, credit cards)
By reviewing your monthly expenses, you can determine how much money you’ll need for one month of living expenses. Once you have that number, you can multiply it by 3 to 6 months to set your emergency fund target.
Step 3: Open a Separate Savings Account
Now that you know how much you need, it’s time to open a separate savings account for your emergency fund. It’s important that this account is separate from your regular checking account so that you’re not tempted to dip into it for everyday purchases.
Look for a high-yield savings account or a money market account. These accounts earn interest, which means your emergency fund will grow over time, even if you’re not actively adding to it. While the interest may not be huge, every little bit helps. The goal here is to make sure the money you save is easily accessible, yet not as convenient as your regular spending money.
Step 4: Automate Your Savings
One of the easiest ways to consistently save for your emergency fund is by setting up automatic transfers from your checking account to your savings account. This ensures that you’re consistently putting money aside for your fund without having to think about it every month.
Start by setting up small, automatic transfers that fit your budget. For example, you might start with $50 or $100 per month. Over time, as you get more comfortable with saving, you can gradually increase these amounts.
Automation helps you stay disciplined and removes the temptation to spend the money elsewhere. It’s like paying yourself first!
Step 5: Cut Back on Non-Essential Spending
Building an emergency fund doesn’t mean you need to make drastic sacrifices. However, it does help to evaluate where your money is going each month. Cutting back on non-essential spending can free up extra cash to put toward your emergency fund.
Take a look at areas where you might be spending unnecessarily, such as:
-
Eating out
-
Subscriptions (streaming services, magazines, etc.)
-
Impulse shopping or online purchases
-
Expensive hobbies or entertainment
By trimming a few unnecessary expenses, you can redirect that money into your emergency fund. It doesn’t need to be a huge amount—small sacrifices can add up quickly!
Step 6: Track Your Progress and Stay Motivated
As you begin to save for your emergency fund, it’s important to keep track of your progress. Monitoring how much you’ve saved helps you stay motivated and gives you a sense of accomplishment as you reach your goals.
Consider using a budgeting app or a simple spreadsheet to track your savings. Some apps even let you set up goals, so you can see how close you are to reaching your target. Celebrate your milestones, whether it’s saving your first $500 or hitting your one-month target.
Step 7: Use Your Emergency Fund Only for Emergencies
Once you’ve built up your emergency fund, it’s crucial to remember its purpose emergencies only. The key to maintaining a healthy emergency fund is discipline. If something unexpected happens, like a medical bill or a job loss, you can dip into the fund to cover the cost. However, it’s important to avoid using it for non-emergency purchases or as a “just-in-case” fund for smaller, unnecessary expenses.
The goal is to keep your emergency fund intact so that it’s there when you truly need it.
Step 8: Replenish Your Emergency Fund After Use
If you need to dip into your emergency fund for an emergency, don’t worry! Life happens. However, once the situation has passed, your next priority should be to replenish your emergency fund as soon as possible.
Start by putting any extra savings or windfalls (like tax refunds or work bonuses) toward your fund. Even if you can’t replenish it all at once, make sure you’re consistently building it back up to your goal.
Conclusion
Building an emergency fund is a critical step toward financial stability and peace of mind. While it may seem like a daunting task at first, remember that every small contribution adds up over time. By following this step-by-step guide, you can build an emergency fund that will protect you when life throws an unexpected challenge your way.
Remember, the key is to start small, stay consistent, and automate your savings to make it as easy as possible. Over time, you'll have a strong safety net that allows you to weather any storm—financial or otherwise. So, get started today and take the first step toward securing your financial future.
Dreaming of a Finance career? Start with Investment Banking Certification with Jobaaj Learnings.